Coordinating with Planners on Elopement and Mini Wedding Packages with Gretchen Culver

We are chatting with Gretchen Culver from Rocket Science Events and Minne Weddings about how to coordinate with planners on elopement and mini wedding packages. Gretchen shares how and why she started Minne Weddings, how to navigate the micro wedding market, and how to make sure you are still profitable at the end of the day. A little bit about Gretchen, she launched Rocket Science Events in 2010, ultimately becoming the go-to design and planning firm in Minneapolis, MN. In 2020, she opened the doors to Minne Weddings, a luxury brand that provides stylish and affordable micro-weddings in her market. 

Love the podcast? Please leave a 5 ⭐️ review on Apple Podcasts. Thank YOU for your support!

You can listen to Tea with Jainé on Apple Podcasts, Spotify, Google Podcasts, and all other major podcasting platforms. You can make a monthly contribution by using the Support this Podcast button in our profile. Thank you so much for all of your kind support!!

Follow @teawithjaine on Instagram

Want more Tea? One-on-One Coaching is now available! Find out more here!

Visit Our Shop - Get our latest Online Course and E-Guides

Stay in the know! Subscribe to our newsletter, podcast, join our facebook group, and be sure to follow @jainekershner on Instagram.

Greetabl Discount - Save 20% Greetabl and Greetabl Insider Pro. Use code JKERSHNER at check out.

Interested in collaborating? Please fill out our contact page and say hello!

How to use Instagram and Instagram Stories to Attract New Wedding Photography Clients with Andréa Jones

We are chatting with Andréa Jones all about How to use Instagram and Instagram Stories to Attract New Wedding Photography Clients. Andrea is a joy to chat with and shares her useful insight into how we can use Instagram and Instagram stories to connect with our ideal clients, get inquires into our inboxes, and a few things to avoid when using Instagram. A little bit about Andréa is that she is fiercely committed to helping businesses and podcasters build profitable online communities through simple social media solutions. She's the host of the Savvy Social Podcast, which was nominated for “Best Business Series” at the 2020 Canadian Podcast Awards. Andréa is also the creator of the Savvy Social School, a digital platform designed to teach its 100+ members (predominantly small business owners) how to implement organic social media strategies. 

Love the podcast? Please leave a 5 ⭐️ review on Apple Podcasts. Thank YOU for your support!

You can listen to Tea with Jainé on Apple Podcasts, Spotify, Google Podcasts, and all other major podcasting platforms. You can make a monthly contribution by using the Support this Podcast button in our profile. Thank you so much for all of your kind support!!

Follow @teawithjaine on Instagram

IG Feed.jpg

Want more Tea? One-on-One Coaching is now available! Find out more here!

Visit Our Shop - Get our latest Online Course and E-Guides

Stay in the know! Subscribe to our newsletter, podcast, join our facebook group, and be sure to follow @jainekershner on Instagram.

Greetabl Discount - Save 20% Greetabl and Greetabl Insider Pro. Use code JKERSHNER at check out.

Interested in collaborating? Please fill out our contact page and say hello!

Navigating Pricing During a Difficult Year

We are chatting with Michelle Loretta from Be Sage Consulting all about navigating pricing during a difficult year. Michelle helps break down why discounting is never a good idea, how to ensure your business will survive the next “pandemic” like event, and how pricing is really part of your marketing strategy. A little bit about Michelle’s business Be Sage Consulting was one of the first B2B resources specifically tailored to creatives who wanted to become better entrepreneurs. Michelle works one-on-one with event pros to adjust and redefine their business strategies. Be Sage Consulting also hosts an annual Be Sage Conference, which welcomes creative entrepreneurs from around the world for a weeklong mastermind on all things business.

Love the podcast? Please leave a 5 ⭐️ review on Apple Podcasts. Thank YOU for your support!

You can listen to Tea with Jainé on Apple Podcasts, Spotify, Google Podcasts and all other major podcasting platforms. You can make a monthly contribution by using the Support this Podcast button in our profile. Thank you so much for all of your kind support!!

Follow @teawithjaine on Instagram

IG Feed.jpg

Want more Tea? One-on-One Coaching is now available! Find out more here!

Visit Our Shop - Get our latest Online Course and E-Guides

Stay in the know! Subscribe to our newsletter, podcast, join our facebook group, and be sure to follow @jainekershner and @teawithjaine on Instagram.

Greetabl Discount - Save 20% Greetabl and Greetabl Insider Pro. Use code JKERSHNER at check out.

Interested in collaborating? Please fill out our contact page and say hello!

How to Legally Grow Your Team with Magi Fisher

We are chatting with Magi Fisher from Magdalena Studios and The Artists Lawyer all about how to legally grow your team. Magi shares how she has grown her business to a team of 12 and shares how they photography up to 100 weddings a year. How by having a strong legal structure in place, you can grow your team and business to become more profitable than you could have imagined. A little bit about Magi is that she is a wedding photographer and lawyer based in New Jersey. Magi’s mission as an artist and attorney is to provide honest and essential guidance for passionate pursuers. She strives to help creative entrepreneurs achieve success with foundational business practices and legal resources.

Save 20% OFF all contracts from The Artists Lawyer - Use Code TEAWITHJAINE at checkout

Love the podcast? Please leave a 5 ⭐️ review on Apple Podcasts. Thank YOU for your support!

You can listen to Tea with Jainé on Apple Podcasts, Spotify, Google Podcasts and all other major podcasting platforms. You can make a monthly contribution by using the Support this Podcast button in our profile. Thank you so much for all of your kind support!!

Follow @teawithjaine on Instagram

IG Feed.jpg

Want more Tea? One-on-One Coaching is now available! Find out more here!

Visit Our Shop - Get our latest Online Course and E-Guides

Stay in the know! Subscribe to our newsletter, podcast, join our facebook group, and be sure to follow @jainekershner and @teawithjaine on Instagram.

Greetabl Discount - Save 20% Greetabl and Greetabl Insider Pro. Use code JKERSHNER at check out.

Interested in collaborating? Please fill out our contact page and say hello!

Speaking at IGNITE 2019 Workshop

I’m so excited to share that I’m going to be speaking at the upcoming IGNITE 2019 workshop hosted by NJ SPARK on Saturday, April 23rd, 2019. Each year this incredible group of women host a FREE wedding photography workshop and I’m so thrilled to be teaching one of the breakout sessions. Yay!

I’m going to be teaching attendee’s how create content for Instagram with images they already have and how to schedule, plan, and auto post with Planoly to get your life back and OFF social media. Ahhh, I’m SOOO excited!! The conference has already sold out (it’s free but the 75 spots are all full) but they do have a waiting list if you want to sign up to find out more and hopefully snag a spot! xo

Jaine Kershner - Brklyn View Photography

Want more Tea? One-on-One Coaching is now available! Find out more here!

Stay in the know! Subscribe to our newsletter, podcast, join our facebook group and be sure to follow @jainekershner on Instagram for the latest Tea with Jainé IG TV episode.

Greetabl Discount - Save 20% Greetabl and Greetabl Insider Pro. Use code JKERSHNER at check out.

Interested in collaborating? Please fill out our contact page and say hello!

How to Submit Your Wedding Photography to a Blog or Magazine

One of the most frequently asked questions I receive is about how to submit your work to a magazine or blog. How do you do? Which one do you submit too? What if no one ever replies to you? I've been very fortunate and grateful that my wedding photography has been published in several print magazines, online magazines, and numerous blogs. My work has also been featured on magazine covers, published in books, and I photographed an entire wedding book (Weddings In Color) as well. With my years of submission experience, I thought I'd take some of the guesswork out of submissions and share some of my best practices to help you create the best submission so you can to potentially get featured.

If you want to know how I curate, export, and submit my own wedding submissions, I’ve created an e-guide to help you streamline the entire process. An Insider’s Guide to Wedding Submissions is a 7-page downloadable PDF guide that will help you put together your wedding submission. Find out more about the guide here.

Why should you submit your wedding to a Blog or Magazine? One of the best benefits of having your work featured in print or online is to showcase your work, your vendor’s work, and your client’s vision. Most of my couples love when their wedding is featured and all of the vendors appreciate the recognition. It's sort of a "job well done" moment for everyone involved once the feature is live online or printed. Second, SEO is an incredible marketing tool for you, your vendors, and venues. The more links back to your site mean the more opportunities for new people will find you. The venue and vendors also get a great return for their work and when they show their services to new potential clients, they will be using your images to do so. Last, Social Proof that you are a good photographer and editors/publishers think so as well. Your couples will see your work in more places other than your own website, blog, and Instagram account. What's the old saying? You have to see something 7 times before you remember it, so the more times you are featured online or in print, they will remember your name when looking for a wedding photographer.

How to Submit your Wedding Photography to a Blog or Magazine

No. 1 - Curate Your Images - Most magazines or blogs want up to 100 images per submission ONLY. This means that you have to be super selective about which images you include in your submission. You can tailor each submission to the specific publication by focusing on which images they might like to see included. Speaking for myself, I only include up to 100 of my BEST images from each wedding, engagement or styled shoot. I look at each image individually and ask myself if I were to be judged on this one image alone, would I be ok with this photo to represent my entire portfolio. If I don't, then it doesn't make the submission. You have to be harsh with your choices because a smaller and stronger submission will have a better chance of being selected vs. 100 "just ok" images that don't represent your artist's ability. 

No. 2 - Get Your Specs Right! - In most cases, the online publication or magazine will have a FAQ or Submissions page where you can find out exactly what specifications they are looking for regarding image count, size and how to submit. Once you know what they will (or won't accept) you should start to curate your images. Be sure to include every single vendor you worked with inside your submission. You don't want to accidentally forget to mention someone who worked really hard on the event.

*PRO TIP* - I created Lightroom Export Presets for each publication I regularly submit to thus saving me time and energy per submission. I put in all their image specifications, save my preset, and export my images. Super easy and very fast!

No. 3 - Make Sure Your Style Matches the Publication - I cannot stress this enough but if your photography style isn't a match for the magazine you are submitting to, chances are you will not be accepted. I highly recommend that you do your research and figure out which publications you would like to be featured in and see if your style would fit their esthetic. Like minds think alike and like images will most likely get accepted on a blog that features similar style imagery. Once you've figured out your ideal publication and curated your submission, in time you will have more accepted features than rejections.

No. 4 - How to Submit Your Images - Again, this information is most likely clearly stated in the FAQ or Submissions section on their website or masthead of the magazine however you do have a few options:

  1. Submit directly to the publication via their website or blog.

  2. Contact the editors directly and send your images via an online gallery or Dropbox (or similar service).

    *PRO TIP* If you do this method, please make sure your galleries and Dropbox folders do NOT have a password on them. You want the editors to easily gain access to your images and quickly review the photos at a glance. You do not want to hinder their ability to view your work.

  3. Use a third-party software application such as Two Bright Lights or Matchology. This is a subscription bases service that allows you to upload your images and submit to multiple blogs and magazines from one central location. It can save you time in the long run because you will not have to fill out the vendor information or re-upload the images because all of that information is already online. The Knot owns Two Bright Lights so they want all their submissions to go through that system and Matchology is a great tool for more localized niche blogs which is perfect for targeting your audience.

No. 5 - Following Up and Being NICE! - After you have successfully submitted your wedding, engagement session, or styled shoot for consideration, it's a waiting game. Usually, on the FAQ page, the publication will tell you how long it will be until you hear from them. Most places are between 4-6 weeks but some outlets never reply. They receive so many submissions that it would be impossible to get back to everyone. I know, it's a bummer but it does happen. What I like to do is follow up in two-week intervals with the editors via email. I will send a polite email simply following up on my submission and asking if any decisions have been made. It's short and sweet and ALWAYS nice. I cannot stress this enough! DO NOT BE MEAN PEOPLE!! The editors are the gatekeepers to their online/print world and you do not want to piss them off. You will never get a reply if you are rude or following up to the point where they have moved your email into their SPAM folder the very moment it comes pops up. (just kidding!!) When you are nice, you can follow up and not be annoying and they will remember that. Even if you were rejected, maybe that editor will remember your work for another feature and reach out to use one of your images somewhere else. It happens ALL the time so if you start burning bridges now, it's not going to get any better along the road. 

No. 6 - Don't Take It Personally - Nobody likes rejection and it can truly sting when it's about your photography. Believe me, I would know! It happens all the time but that's ok because it might sting for a few hours (a day at the most!) but I do not take it personally. I just move on to the next publication and try again. It could be that the blog just featured a wedding very similar to yours, or your style didn't match, or it just wasn't a fit and hey, that's ok! If you want, you can ask the editor why they rejected your work and if they had any advice to share. This information and feedback is INVALUABLE if they reply to you. Not all will, but some do! Gaining access to an editor’s insight is going to help you with your next submission, your next shoot, and your next wedding to make it even better than before.

BONUS: I received a couple of questions about how I style my flat lay detailed photos for weddings and submissions. While I'm no expert, I do love taking the time to style these photos to tell a cohesive narrative of my couple’s wedding day. The bonus? Publications LOVE these types of photos that clearly and beautifully showcase the couple’s details of the day.

Need more help? An Insiders Guide to Wedding Submissions is going to be perfect for you to create a wedding submission that editor’s love and gets featured!

I hope this was helpful and encourages you to submit your work to be considered for publication. With a little effort and time, you'll be getting more Yes's than No's in no time! Have any questions you'd like me to answer? Please leave it in the comments below. I can't wait to hear from you! 


Want more Tea? One-on-One Coaching is now available! Find out more here!

Stay in the know! Subscribe to our newsletter, podcast, join our facebook group and be sure to follow @jainekershner on Instagram for the latest Tea with Jainé IG TV episode.

Greetabl Discount - Save 20% Greetabl and Greetabl Insider Pro. Use code JKERSHNER at check out.

Interested in collaborating? Please fill out our contact page and say hello!

Best Instagram Apps for Editing Photos and Stories

After I shared my favorite tips how to use Instagram for your wedding photography business, I received a few direct messages asking me to recommend my favorite editing apps for Instagram. There are a gazillion apps out there so I thought it might be helpful to share my top apps that I frequently use to plan, edit, and share my photos on my Instagram grid and stories. 
 

Best Apps for Planning Your Instagram Feed

Planning and Auto Posting Your Images:
I've mentioned this a few times but I use Planoly to plan my Instagram grid in advance. I like that I can visually see how my photos are going to look prior to posting them. I created a photo grid for myself that I like to follow which helps me speedup my planning workflow. Instagram has also given third-party applications, such as Planoly, access to auto-post your images, which is a true game changer. Other applications you can use to do the same thing is Iconosquare and Later.

Best Apps for Editing Photos in Instagram

Editing Your Photos:
When I want to add a photo I've taken using my iPhone, I will use a photo editor to brighten, straighten, crop, my images before I share it on my account. My favorite app is Filmborn by Mastin Labs. This can give your photos a "film-like" look but I really just use it to brighten my images and remove some of the dark shadows and contrast. Afterlight is also a great app for Instagram to brighten your images and adjust the highlights, shadows and contrast. Both apps have in-app purchases for more options.

Best Instagram Apps for Adding Text and Borders

Adding Text and Borders to Your Photos and Instagram Stories:
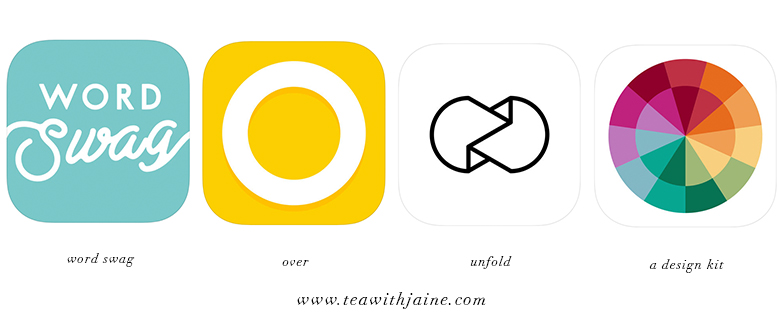
By far, my favorite app to do this is Word Swag. It's so user friendly and they have a lot of great font options, backgrounds and sizes to choose from. Additional options are Over and A Design Kit for more fun font options and additional stickers and cool colored backgrounds. You can never have too many options, right? If you want to make a cohesive story showcasing your wedding or photography, you should try the Unfold app. You can add white borders, text, multiple images to one slide and much more. It makes your story really stand out among the crowd!

Best Instagram Apps to Edit Videos and Create Slideshows


How to make Slideshows for Instagram Stories:
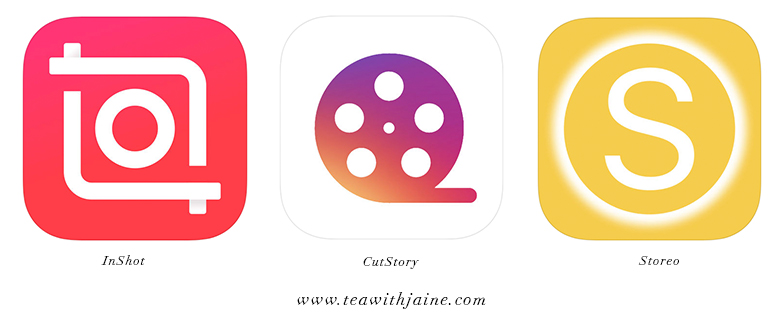
It took me a while to find an app that I could easily make a 15 sec slideshow for my Instagram story that was  fairly easy to use. I finally found InShot and paid to remove the logo inside of the app which is well worth the $1.99 fee.

How to cut your videos for Instagram Stories:
If you don't want to keep creating 15 second videos for your Instagram Stories, you have the option to record one video and then have Cut Story or Storeo clip your full length video into 15 second intervals automatically. Once the app is done, you can just upload each clip to your Instagram feed.

Best Instagram Apps for Hashtags and Adding Sparkle

Add Some Sparkle to Your Story:
If you know me, you know I love my glitter and I really love using the Kira Kira app to add a little bit of sparkle to my stories. It's great for adding a bit of bling to the ring or beaded wedding dress. It's super fun and I might be addicted to using it!

Automatic Hashtag Generator for Photographers:
My last recommendation comes with a warning, do not solely use this app to create hashtags for your photos. Focal Mark is an application that will automatically generate instagram hashtags that are the most popular to the content you are posting. This is specifically designed for photographers. You can tell it what your subject is, what location the photo in and what camera type you used. Next, Focal Mark will search Instagram and give you the best hashtags to use for your photo. However, you do have to pay to access all 30 hashtags which is the max you are allowed to post inside the app. My advice would be to use this app for part of your hashtags (let's say 15) but then use different hashtags that you found on your own for the remaining 15. This way, it's more authentic and you have less of a chance of being shadow banded by Instagram. (oh, it's a thing - look it up!)

I hope these Instagram app recommendations where helpful and help you create some great content for your own Instagram account. Do you have any apps that you love and would highly recommend? Please leave them in the comments below. We'd love to hear from you!


Want more Tea? One-on-One Coaching is now available! Find out more here!

Stay in the know! Subscribe to our newsletter, podcast, join our facebook group and be sure to follow @jainekershner on Instagram for the latest Tea with Jainé IG TV episode.

Greetabl Discount - Save 20% Greetabl and Greetabl Insider Pro. Use code JKERSHNER at check out.

Interested in collaborating? Please fill out our contact page and say hello!

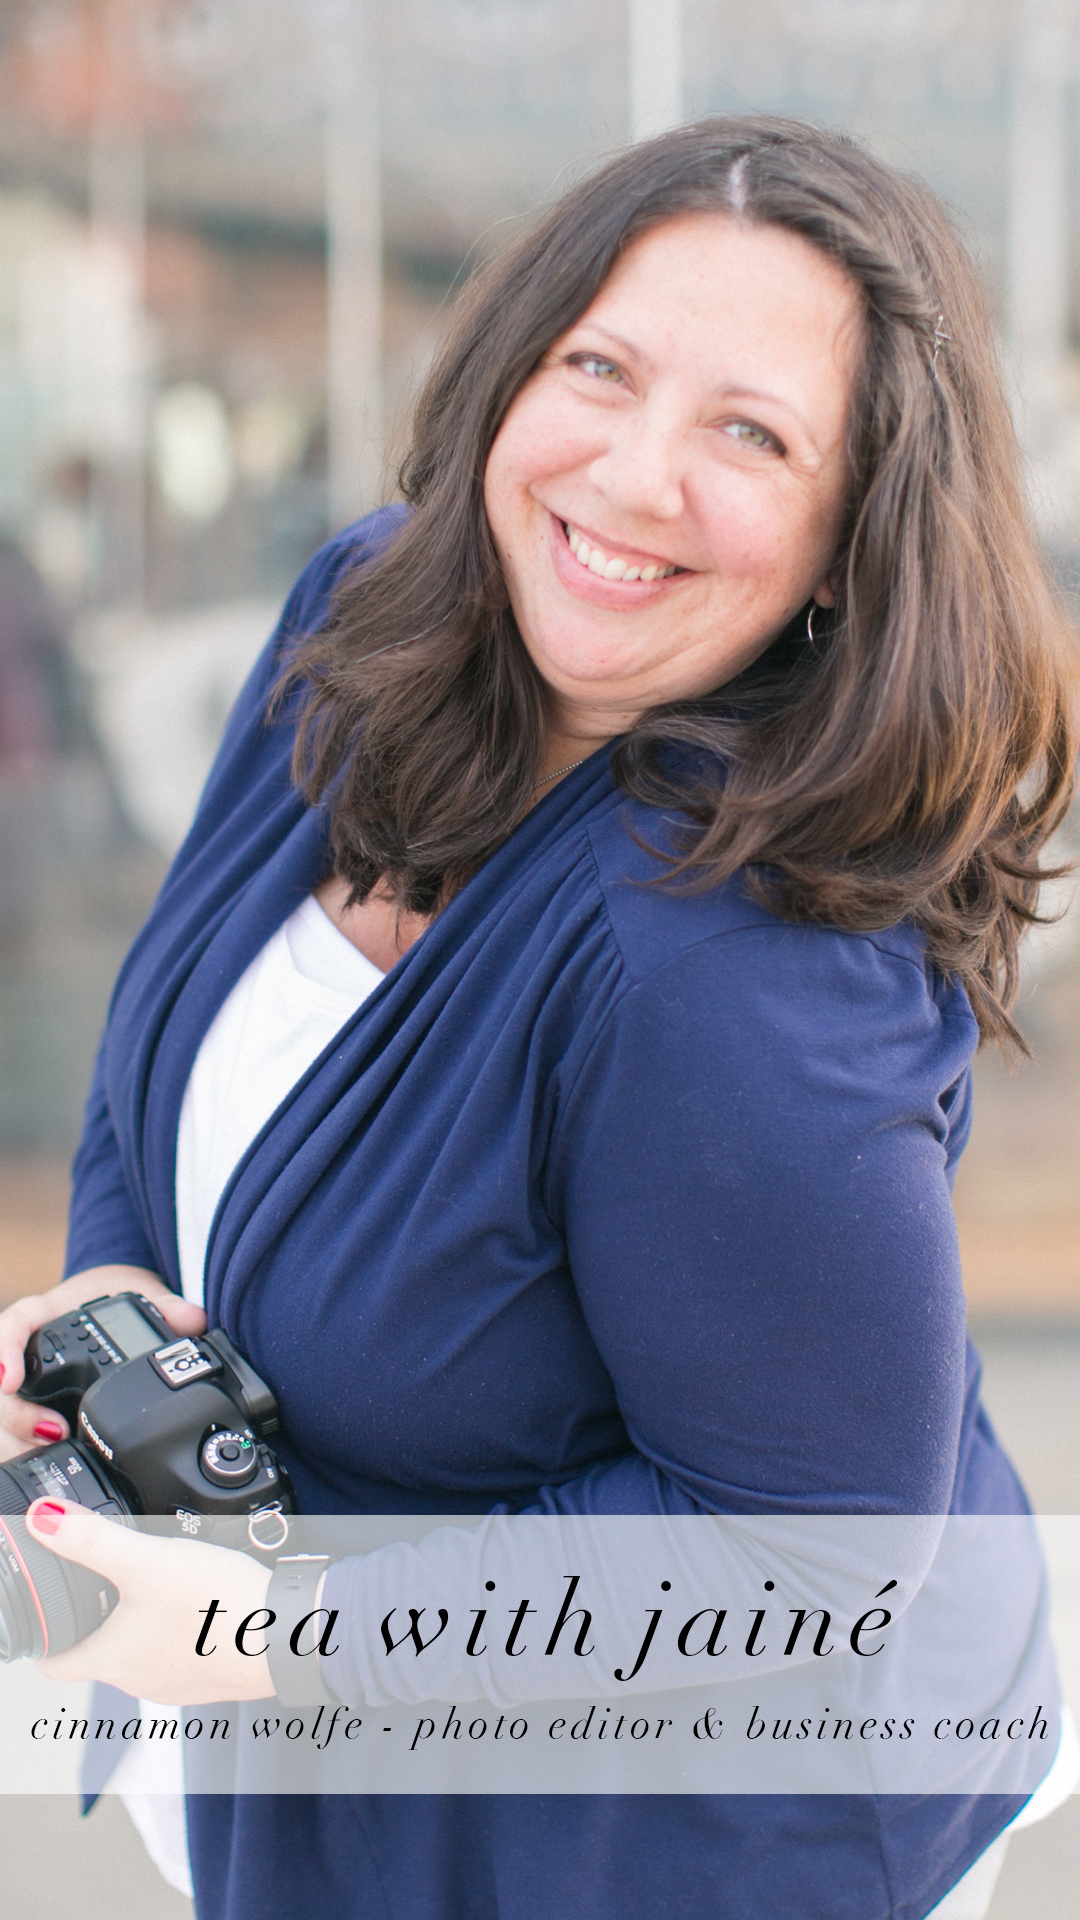
Blogging Workflow and SEO Tips from Cinnamon Wolfe

The latest episode of our Tea with Jainé Podcast has been released and it is jam packed with amazing blogging advice and SEO tips from Cinnamon Wolfe. Cinnamon is photo editor and business coach who specializes in helping creatives maximize their business potential. This podcast is so incredible and packed full of helpful advice that you will definitely have to listen to it twice. Seriously, it's so good!

You can listen to the latest podcast episode of Tea with Jainé on Apple Podcasts, Spotify, Google Podcasts and much more. Visit our Anchor Profile for a full breakdown of supported platforms.

Cinnamon Wolfe Photo Editor and Business Coach

Want more Tea? One-on-One Coaching is now available! Find out more here!

Stay in the know! Subscribe to our newsletter, podcast, join our facebook group and be sure to follow @jainekershner on Instagram for the latest Tea with Jainé IG TV episode.

Greetabl Discount - Save 20% Greetabl and Greetabl Insider Pro. Use code JKERSHNER at check out.

Interested in collaborating? Please fill out our contact page and say hello!

How to Setup Lightroom Catalog and Useful Keyboard Shortcuts

I wanted to share my best practices when it comes to setting up your Adobe Lightroom Catalog because I think it's very important to start off on the right foot when editing, backup and archiving your photos. Lightroom is an incredible photo editing program that has a ton of features which can become very overwhelming when you are first starting out. I have studied and mastered how I use Lightroom to edit my photos and I wanted to share with you how I prefer to setup my Lightroom Catalogs along with some of my favorite Lightroom Keyboard Shortcuts.

I will preface this post but saying that I wouldn't know anything about Lightroom if it wasn't for Jared Platt's Creative Live course Lightroom 101. I bought that course and watched it 3-4x's in a row to truly understand how to setup my catalog and edit my photos as efficiently as possible. I would highly recommend checking out his catalog of courses on Creative Live. I met him once at WPPI and thanked him for helping me and changing my editing workflow process from top to bottom.

How to Setup Your Lightroom Catalog


No. 1 - Create a NEW catalog for each and every job you photograph. Think of a Lightroom catalog as filing cabinet and your photos are the "files" inside. You want to keep all of the folders and files inside one filing cabinet at a time. If you were to keep all of your photos inside the same catalog, archiving and and keeping track of your "files" (aka. your photos) is going to become a hassle and you could get the dreaded question mark (Folder Missing Icon) inside of your catalog. To keep everything organized, I create a new folder for each client and create the same file set inside their folder which includes a Catalog, Images and Print folder. When I am done organizing, editing and exporting the images and have delivered them to my clients, I will archive them to my backup drives and within time, deleted them from my computer. If I were do this while only using one main catalog, I'm going to have a hard time keep track of all the photos that belong to each job. For me, it's peace of mind knowing that everything is in ONE place and can be easily opened, archived, and worked on anywhere without ever missing important photos. 

No. 2 - Turn on Automatic Backups and Write the XMP data for Each Catalog. After you've created your new catalog you should immediate turn on two important functions of Lightroom every single time.

It seems like a no-brainer but turning on Automatic Backup's every time you quit Lightroom is just a extra level of protection for your files. Sometimes catalog's get corrupted but if you've turned on this feature, you can simply go into your Catalog > Backups Folder and simply unzip the last saved backup and start working as if nothing happened. It's 100% worth turning on and takes only a few seconds to complete once you quit the program.

Open Lightroom > Go to the Lightroom Menu > Catalog Settings > In General Tab > Backup > Choose Every Time Lightroom Exits from the drop down menu.

Lightroom Catalog Setup Tips - Automatic Backups

When you are editing photos inside Lightroom (and hopefully your are shooting in RAW) all of the changes you make to the image don't actually touch the image. What's happening is the data is being written to the "sidecar" file which is the XMP file. The XMP data writes on top of your photo like a piece of vellum. It's only a layer that can be easily removed however, Lightroom doesn't automatically process these changes while you are working. Why? I have no idea so you have to tell the program to do this for you thus saving you time and energy if the program were to crash and you lost all your work. Nobody wants that!

Open Lightroom > Go to the Lightroom Menu > Catalog Settings > In General Tab > Metadata > Check the box next to "Automatically Write Changes to XMP". 

Lightroom Catalog Setup Tips - XMP Data.jpg

No. 3 - Build Your 1:1 Previews for every catalog - I'm sure you've heard of Smart Previews when importing your photos into Lightroom. It renders a faster preview of your image so you can edit faster BUT it's still not the fastest. It can still take time to render each image inside of Lightroom thus slowing down your editing time. Your images can look pixelated until Lightroom catches up and processes the file. I find that when I make the Smart Previews upon import, I still need to build my 1:1 Previews to have my images load instantaneously with absolutely no lag time. 

After your images have been imported successfully into Lightroom, select all the images in the Library Module. Next, go to Library Menu > Previews > Build 1:1 Previews. It will take a while for the previews to load so I will go make myself a cup of tea or respond to emails until the process has completed. Once it's done you are ready to edit your images without any rendering or lag time in editing. FINALLY!!

No. 4 - Keyboard Shortcuts - Oh my goodness, Lightroom has a million shortcuts that will become second nature to you the longer you use the program and sometimes they change them on you without warning, which is the worst! 

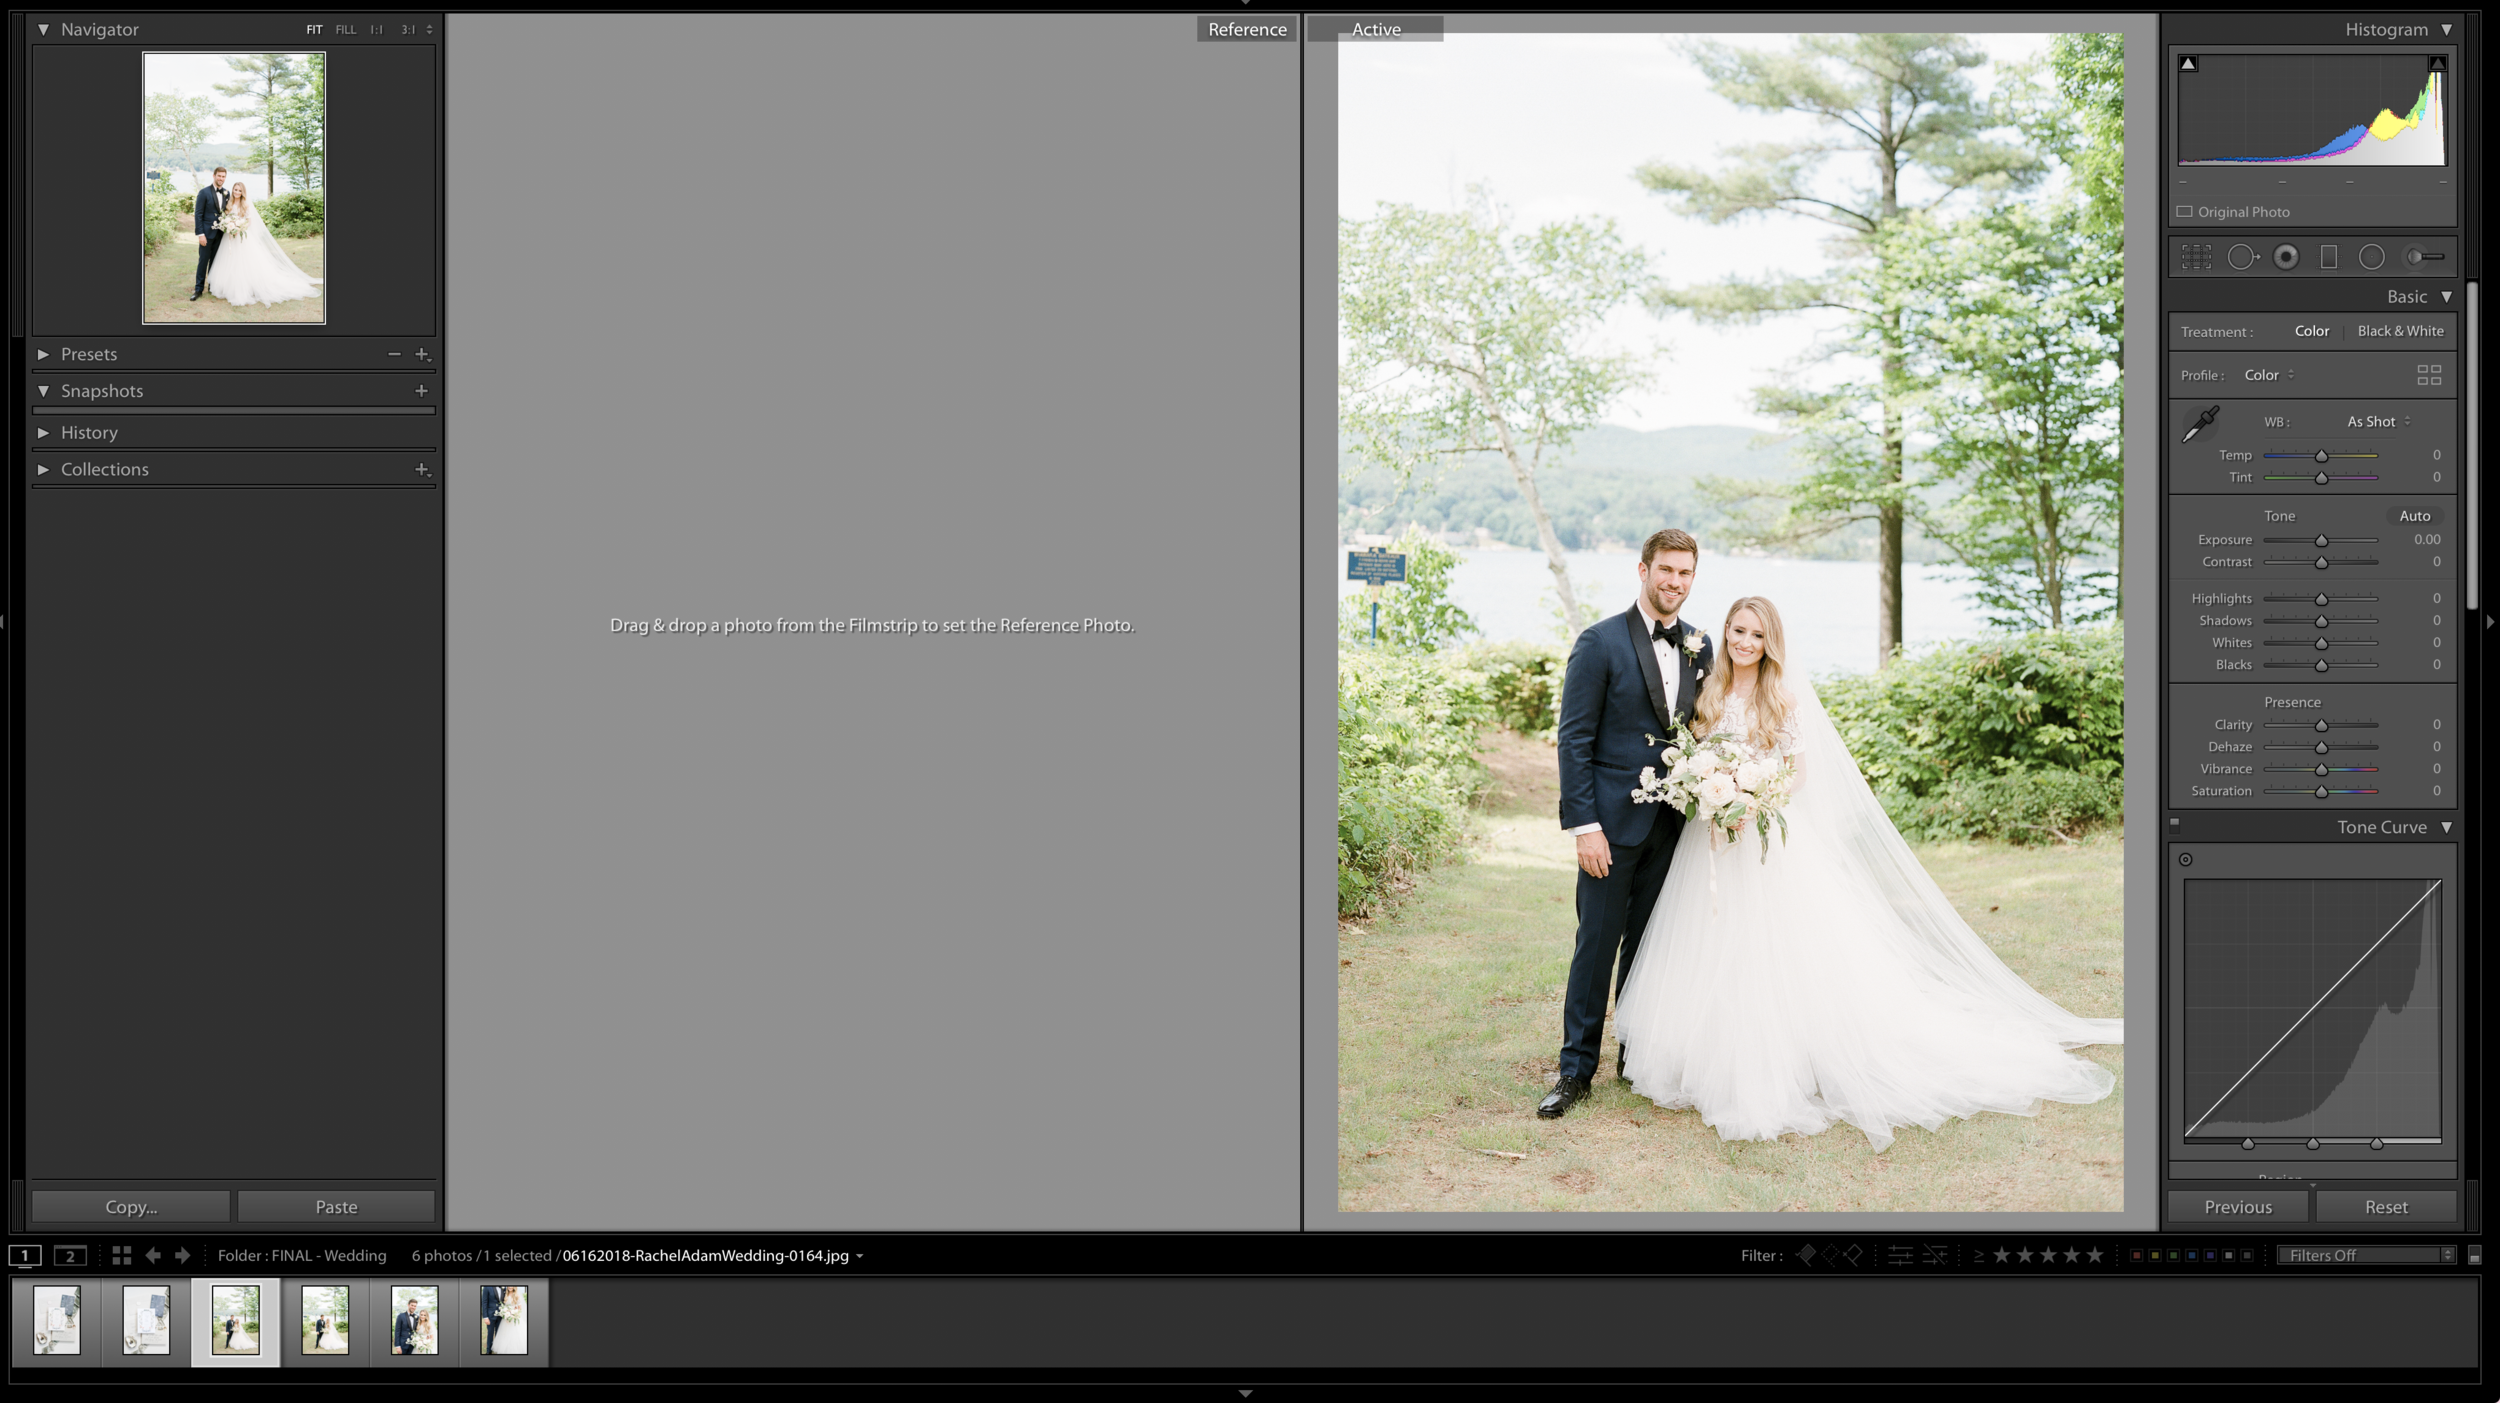
Keyboard Shortcut: SHIFT + R - REFERENCE VIEW
My favorite keyboard shortcut is the Reference View. You must be in the Develop Module (D key) for this to work. The Reference View creates a split screen inside the Develop Module for you to do a SIDE-by-SIDE edit without having to use the pop up window option anymore. Once it's selected, you can drag your Reference photo on the LEFT and on the right, you can edit and toggle between photos to match your REFERENCE image. It never moves until you drag and drop a new REFERENCE image to use. Seriously, it's the BEST shortcut ever for hybrid photographers like myself or anyone looking to match images. 

Lightroom Catalog Setup Tips - REFERENCE View

Keyboard Shortcut: SHIFT + F - FULL SCREEN MODE
I prefer to use my Lightroom screen to it's fullest capacity which means I do not want to see my menu bar (For Mac Users), my dock, the clock or any other apps while I am editing. So I love the SHIFT + F keyboard shortcuts. They allow me to toggle my screen from being able to see my menu bar, to completely hiding it. It's a great shortcut to help you max the screen space that you have.

There you have it! My favorite Lightroom Catalog tips and setup options I use just about everyday. I hope they were helpful and will save you time and peace of mind in the future. What are some of your favorite Lightroom Tips and Tricks? Any keyboard shortcuts you want to share? Please leave them in the comments below!


Want more Tea? One-on-One Coaching is now available! Find out more here!

Stay in the know! Subscribe to our newsletter, podcast, join our facebook group and be sure to follow @jainekershner on Instagram for the latest Tea with Jainé IG TV episode.

Greetabl Discount - Save 20% Greetabl and Greetabl Insider Pro. Use code JKERSHNER at check out.

Interested in collaborating? Please fill out our contact page and say hello!

3 Tips How to Avoid Client Negotiations About Pricing

Over in the Tea with Jainé Facebook group, I received a question about what to do when a potential client starts to negotiate about your prices while you are already in a meeting. Ummmm, can we say awkward? This person had two potential couples start to haggle with her at the very end of their meetings and she was beginning to feel discouraged. She wanted to know if I had any tips to help avoid this from happening again. Boy, do I! This is such a great topic that I recently posted my thoughts over on my Instagram IGTV channel and wanted to follow up with a more in-depth blog post. Here are my top three tips how to avoid awkward client negotiations about your photography prices.

No. 1 - Make Your Wedding Packages SIMPLE - I think the biggest "A-HA" moment for myself was when I started to reflect on what my couples were booking vs. what I was offering. When I first started out, I had several collections with all sorts of options that frankly, were VERY confusing. Every couple wanted something different and I was tired of making "custom collections" so I decided to update my wedding packages to what my couples really wanted and go from there. I created three collections and I made my base collection the minimum I needed to do my job of capturing a wedding from start to finish. This way, there would be no more negotiations about what to "take out" because there was literally nothing to take out. For myself, my base collection will always include 8 hours of photography, a second photographer and the digital files. Once I decided that this was the right formula for me, I built my next two collections on top of this base collection so when someone asks to take out the engagement session or remove the albums, I refer them back to the base collection. I will not remove anything items or services from the base collection because it's the minimum I need to do my job. I wouldn't take a job that wanted me to do less (unless it was a small wedding or elopement which would have separate pricing all together - see my note below). 

So, how do you do this for yourself? I would figure out what is the minimum you need to cover your weddings or events and start from there. It won't be the same as mine but knowing what your base collection is will stop clients haggling over your services because if they can only add-on, they won't be able to take anything away. 

Also, I would recommend having a different collections for the different types of weddings and events you photograph. If you specialize in small weddings and elopements, having different pricing for those types of events will alleviate the frustration of creating smaller collections from your full wedding day services every time someone inquires. If you are a destination wedding photographer, having separate collections for your destination and local weddings is a great way to minimize any type of price negations as well. Only send your potential client the pricing information for their type of event. 

No. 2 - Share Your Prices In Advance - I cannot stress this enough but no one, I mean, NO ONE wants to be surprised especially when it comes to talking about money. They want to know in advance how much your services cost (if not start at) and you should tell them well in advance to ever meeting them in person. As I mentioned in my blog post about Ghosting, one of the biggest reason people ghost you is because they have complete sticker shock. I strongly suggest listing your starting price on your website contact and investment pages. When I first reply to new inquries, I always reiterate my "starting rate" and I ALWAYS send my pricing guide before each phone call.

What should you do? I would create your own process where you will send clients your full collection guide prior to any phone call or meeting so they have time to read and review it. They'll be able to see your wedding packages, prices and be able to ask any questions specifically related to your prices during your meeting or phone call. No more awkward conversations about "asking for a discount" or "what can we do to lower the cost" when you are already in a meeting. Phew!

No. 3 - Get Comfortable With The Word "No" - I know, no one likes to be the bad guy and say "No" to a potential client but to be a successful business person, you have to learn to say the word "No" and for the right reasons. However, with that said, I do have a twist on the way you say "No" without really having to say it. When someone asks for something that I'm not comfortable doing or I don't want to "swap out" to lower the price, I always suggest something else that could possibly be a better solution and benefit both of us. How you ask? Let me explain...

Let's say someone is asking for a discount on an album and I already know that don't offer discounts on albums. How would I answer them? I would say is "Unfortunately, I don't offer discounts on my albums but if you choose to add and album to your collection, I would love to gift you additional spreads as my way of saying Thank You". I'm saying "No" but in a positive way and offering something of value to my client vs. taking money away from my profits. Offering your client something of value such as additional hours of coverage, more pages in their album, an engagement session, etc... is inherently more valuable to them then lowering your prices for your services.

Being able to confidently explain and defend your pricing will lead to less haggling and negotiations during your client phone calls and meetings. I truly believe streamlining your pricing structure for your photography services, being up front with your prices and able to politely (but firmly) say "No" is the best way to avoid awkward negotiations and book the perfect couples just for you.  

What are your thoughts? Have you ever had an awkward conversation about your prices with a potential client? What did you do? I hope these tips were helpful and I'd love to hear from you in the comments below. 


Want more Tea? One-on-One Coaching is now available! Find out more here!

Stay in the know! Subscribe to our newsletter, podcast, join our facebook group and be sure to follow @jainekershner on Instagram for the latest Tea with Jainé IG TV episode.

Greetabl Discount - Save 20% Greetabl and Greetabl Insider Pro. Use code JKERSHNER at check out.

Interested in collaborating? Please fill out our contact page and say hello!